Friday, June 29, 2012

Look Mom! No Training Wheels.

A couple of weeks ago during Brayden's friend Avery's birthday party, Brayden saw another little boy riding his bike without training wheels. For a boy who likes to blaze the trails as a leader, he most definitely is persuaded by seeing others his age doing something he hasn't tried yet (and yes, this slightly freaks me out, but I try not to let my mind go there yet). So we came home and tried taking off his training wheels on his big boy bike. And he freaked. Which is slightly frustrating, considering it's really no different than his Strider balance bike that he had grown so accustomed to. It just had pedals. Thank goodness for a patient husband, who crouched over at a 90 degree angle to push the scared 3 year old around the block, instilling courage and encouragement. Brayden was still scared, so we laid it to rest.

2 weeks went by and we never brought up riding without training wheels again. When I got home from my girls weekend last Sunday, we packed the boys up to go to the park. And wouldn't you know, Brayden wanted to ride without training wheels. So we let him ride. And wouldn't you know, the one time I didn't pack my camera up, Brayden Thomas took off on his own without training wheels just like it was no big deal and he'd done it all of his 3 little years. He was so proud, even exclaiming after one run "I did awesome!" (he doesn't lack confidence, that's for sure!). I could kick myself for missing out on a big milestone. We took full advantage of the camera the next night at home. I'm so proud of my big guy, and sad at the same time-- he's growing up so fast!


notrainingwheels_2
Look at Drew's smile. He's one happy daddy!
notrainingwheels_4
Check out the knee pads, elbow pads and gloves. Brayden is obsessed and wants to wear them all. the. time.
notrainingwheels_6
notrainingwheels_8
notrainingwheels_14
notrainingwheels_17
showing me his awesome elbow pads :)
I love you Brayden and am so proud of your accomplishment!

(PS-- I'm linking up today with Jenna's Journey for the commenting challenge!)

Thursday, June 28, 2012

Girls Trip 2012.

Last weekend I traveled to Branson with some of my besties for a girls getaway retreat. The trip was a blast, but I came home exhausted and to a busy, full week. Thus the lack of blogging this week. Not to mention I've just been in a kind of blah mood, which means that my creativity right now is lacking. What isn't lacking, is the laughs I get when I see these pictures. I am so so so blessed to have girlfriends who love the Lord, love me, and love to have a good time. I pray that each of you are blessed with the same.


girlstrip2012
First night out for dinner. I ran in high heels to make it into this picture. Please, hold the applause. ;)
girlstrip2012_5
2nd night out, at the Branson Landing.
girlstrip2012_6
Katie said she wanted to hold me in the picture. Clearly she undercalculated my weight a bit. LOL
girlstrip2012_7
we got a good laugh out of it though
girlstrip2012_32
don't cross us.
girlstrip2012_12
I love these two girls. If you ever need a laugh, just hang out with them. Seriously.
girlstrip2012_13
Jenny and I with our smoking guns.
girlstrip2012_14
Jenny trying to decide if she should take up a career in modeling
girlstrip2012_22
Mere and I shared a margarita at dinner. It was incredible
girlstrip2012_20
we got a lot of stares when we were out and about. One lady even took our picture and sent it to her son because he had refused to come with her to Branson since Branson was only for "old people who don't have fun". ha!
girlstrip2012_28
I'm sparing the embarassment to my two friends by omitting the picture taken right before this one. Let's just say it's hilarious.
girlstrip2012_30
girlstrip2012_26
girlstrip2012_25
girlstrip2012_24

I'm hoping to get to a few other posts that need to be written... mainly about my boy Brayden, who is now fearlessly swimming on his own and riding a bike without training wheels (yes, I'm ready for him to quit growing... life's flying by way too fast). And now, I'm retreating to my lair, away from this awful 100+ degree, record breaking heat.

Thursday, June 21, 2012

My Refinished Mirror.

Remember the post about my living room, where I said I was going to refinish my mirror. Well, I did it! I was SO SO SO thankful that it was an easy project. After my chevron stacked frame, I'm not sure I have enough in me for something that's difficult and requires much though :)

So basically, I read and watched all of the tutorials that I could find on All Things Thrifty. I seriously love her blog, and her tutorials are some of the best I've found when it comes to refinishing furniture. This mirror is metal, so I was kind of nervous about how it would do with spray paint, but it did well. I picked out my spray paint (I used Krylon's paint and primer in one, in ivory with satin finish- it worked really well). Then I went to Lowe's and bought my glaze... holy cow that stuff is expensive! Granted, a little goes a long way, but still, I wasn't expecting to pay $21 for a small can of glaze. Hoping I can put the rest to good use soon on some other things I want to do around my house.

After the paint was cured for a few days, I set to glazing. I was super nervous about it, but it really was easy. I just painted the glaze on with a sponge brush, and then wiped off with a piece of an old undershirt. I had to put about 3 coats on to get the desired thickness I wanted in the creases of the frame.


refinishedmetalmirror
putting on the first coat
refinishedmetalmirror_4
refinishedmetalmirror_10
I used Valspar tintable glaze from Lowe's. I just asked the paint guy to tint it black. It looks more gray, which I guess is why the lady on All Things Thrify says she tints hers more when she gets home. I really didn't feel like messing with it anymore, and it turned out fine.


It took about 3 days for the glaze to completely dry. That made me nervous at first, because I thought I did something wrong. Thankfully a few friends told me that if it's hot/humid (which it is right now) that it can take it longer to dry. Once it FINALLY dried I took all the newspaper off, and to my horror realized that spray paint had still misted underneath the paper onto my mirror. I was almost in tears, but Drew quickly came to my rescue by showing me how I could wipe off the spray mist with a rag doused with a little paint thinner. Between that and my straight edge mirror scraper I got at Walmart, my mirror was clean. And now it sits on my mantle. I love it!


refinishedmirror

I'm still on the hunt for some chunky candle holders for the left side of my mantle. I haven't found what I have pictured in my mind yet, so I just have a blank space right now. I feel like my decor is slowly coming together.... oh how I wish I could just get it all done with at once! And because this stinker insisted that I take his picture too, this post isn't complete unless I show him as well :)

braydencheeseball_1

Wednesday, June 20, 2012

Sleep Eating. Connor Style.

Connor frequently falls asleep while eating. It always reminds me of all of those videos you watch on America's Funniest Home Videos of kids whacking their face in a plate full of spaghetti. It's a bit pitiful, yet it tickles your funny bone to the core. Even Brayden thinks it's hilarious (which makes me laugh harder). I finally realized I could take video with my phone, so you may be getting to see some more live clips of our lives around here. First up: Sleep Eating, Connor Style.

Tuesday, June 19, 2012

Summertime Yummies.

One of my very favorite things about summer is eating Popsicles outside after dinner. It's a special treat to the kids if they eat everything on their plate. The other day we were restocking our supply, and Brayden requested the "brown popsicles" aka fudge pops. I was a bit hesitant since fudge pops are even more of a mess than popsicles. The boys have LOVED them, and even though it is a big mess to clean up, I love having the pictures of their fudge smeared faces to remember :)


summerfun_3
summerfun_5
summerfun_6
summerfun_7
summerfun_9
his "don't mess with my fudge pop" face
summerfun_10
summerfun_12

What are your favorite summertime yummies?

Monday, June 18, 2012

{DIY} Stacked Chevron Picture Frame.

One of the very first pins I ever pinned on Pinterest was this one. It was love at first sight. Stacked frames make me swoon.
Source: etsy.com via Lindsey on Pinterest

Then I found similar frames that had chevron. And I swooned even more. And nearly fainted at the price tags. But oh... they are SO cute!
Source: etsy.com via Jenni on Pinterest

For the record, I have since found out that the reason people charge so darn much for these frames is that they are a pain in the rear. Lesson learned.

If you'd like to be brave like me and attempt this frame on your own, here's what I did to create this beauty.  I apologize for the phone pictures, and the lack of some pictures for some of the steps. I'm no pioneer woman or DIY guru. I'm a mommy blogger with little time for anything other than changing diapers and cleaning up spilled milk. Moving on.

You'll need:
- 1/2 inch MDF board. We purchased ours at Lowe's. An entire sheet will make you roughly 10 backboards for this frame, meaning you could make enough frames to have a gallery wall. If you were that crazy to attempt it :) It costs about $30 for the whole sheet. Rumor has it that some of the home improvement stores will help you cut lumber. We never asked, although I wish we would have (you'll find out why later).
 - a cute frame from the Hob Lob. I chose the one I used when it was 50% off, making it $10. It's an 8x10 opening.
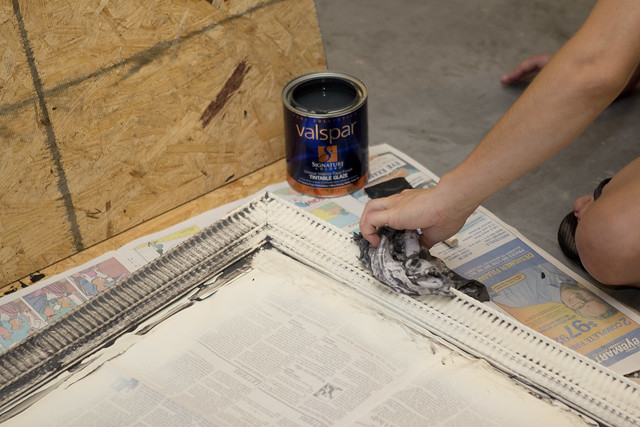
- spray paint, and lots of it. If you've read any tutorials online about spray painting furniture, you've learned two things: Kilz primer is the best, and Krylon spray paint is the only way to go. I actually learned the hard way on the primer part, and wasted some money using a different brand. Go Kilz or go home. For this particular frame I used 1 can of Kilz primer, 2.5 cans of Krylon flat white, and a little less than 1 can of Krylon flat black. My favorite tutorials on how to glaze/spray paint furniture are found on All Things Thrifty.
 - sand paper and sanding block. For my sanding block (this is basically like a big thick sponge that has sand paper on it-- it's a lot easier to handle instead of regular sand paper) I used 320 fine grit, Then when I used the hand sander I used 220 grit, and then I realized I needed 320 grit to really distress it deeply (if that is even a term?). 

How I made this darn thing:
-Cut out a 24"x24" square from the MDF. I don't have pictures of this step unfortunately. I asked Drew to do the sawing part. Saws scare me, even though there are tons of women bloggers who seem to be perfectly fine handling their own power tools. I am not one of those women bloggers, so I left the power tools to my man.  For this particular frame, I wanted my backboard to be 24"x24". I had measured that size for the wall I am putting this frame on. Drew cut out my square (he actually cut straight across the board, thinking that the extra .25 inches wouldn't hurt since it's just a backboard. Remember this fact later.) He then cut out a rectangle in the middle of the square, since I wanted to be able to change out my pictures from my frame. I've since seen a tutorial for a similar frame where they don't cut out an opening, but rather just hang the stacked frame on the baseboard. Either way gets the end results. Do whatever is easier for you.

-Sand the edges. I didn't want my edges too rounded (they'll get more rounded when you distress later), so Drew did 2-3 passes with his palm sander on the edges and top of the frame, just to smooth things out. He used 220 grit for this.

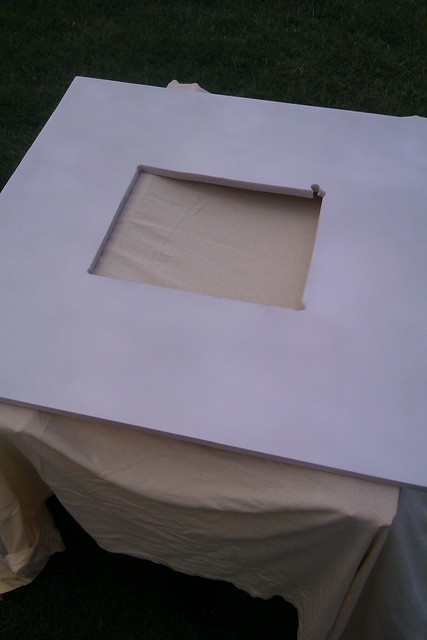
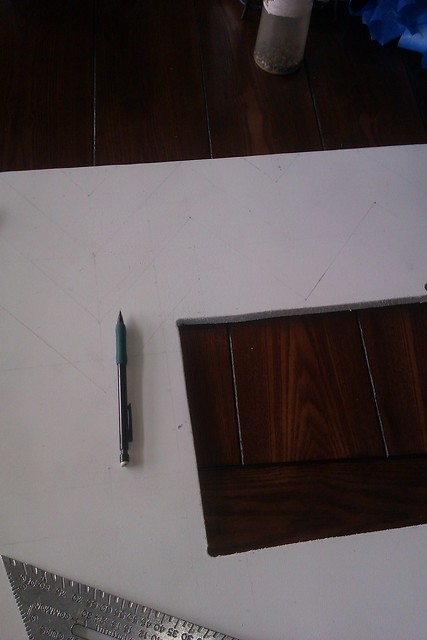
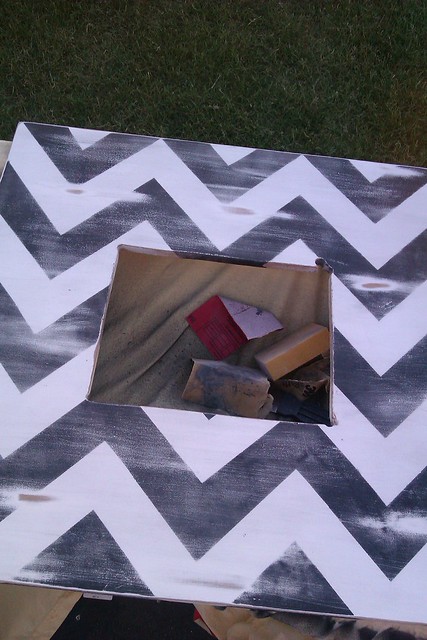
-After he sanded I wiped the frame down with a damp cloth to get all of the dust off. Then I started priming. I used Kilz spray primer to begin with, and then tried to finish (I was making two baseboards at a time) with a different brand. I'm here to tell you, Kilz worked WAY better and covered much more evenly. GET KILZ spray primer as if your life depends on it. You'll thank me later. I let my primer cure 1 day, although I'm pretty sure that wasn't necessary.Also, for some reason this primer made the wood really rough. I used my sanding block to smooth the surface out after I had primed it. Here's what it looked like post cutting, sanding, priming:


IMAG0145
-The next day I started spraying the base coat-- Krylon flat white spray paint. Because my prime job was finished with a lacking primer (therefore it wasn't even), my painting was hindered. This caused me some headaches, and also made me have to probably use WAY more paint that I needed to. Once I was certain that the base coat was even (I had to paint about 3 coats), I let it cure for a day.

- Next I taped off the chevron print. I just have to laugh at this instruction. It seems so easy, right? I mean, all the tutorials for chevron prints on rugs, walls, frames, etc, on pinterest just gloss over this step like it's an easy walk in the park and you'll have no heartburn. I'm here to tell you that I had both heart burn, internal strife and marital quarrels over this stupid print. I almost threw in the towel on it altogether.


IMAG0150
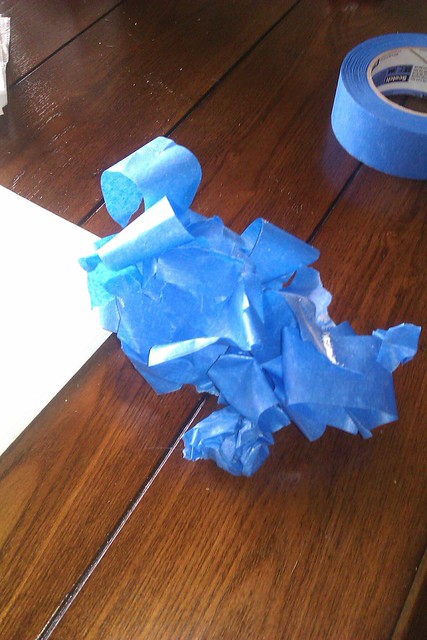
I threw away a LOT of painters tape before realizing that I didn't have the right dimensions for my board


I will come clean and say that geometry has never been my strong point. I did eventually figure it out. Remember how Drew had left .25" on the MDF board at the beginning? After 2 days of me trying to figure out how to tape off chevron print on a 24.25" board, I realized that my measurements would always be off because (a)I had tried to use 1.5" painters tape and (b) because I was not dealing with a perfect square. Once I realized those two things, my heartburn subsided and I was able to move on relatively quickly. Drew simply cut off the extra .25" and I was able to get going with the design.


IMAG0149
my graph being drawn.
Thankfully for you, you can brush right past my maladies and go straight to how to make the print. First, you'll need a good long ruler. I used Drew's level as my straight edge. On your horizontal edge, you'll want to measure out every 4 inches. Mark gently with a pencil (don't worry, it erases well. I would know, as I had to erase 2 separate graphs before realizing my problems were in my extra .25" of frame). Then, on your vertical edge, you'll want to measure out every 3 inches and mark gently. Now create a graph using these marks; you'll basically have a board that has 3x4 rectangles all over it. Here's a graphic, in case you're a visual learner like I am.
chevron graph
Now you need to measure your stripes out. The easiest way I found to do this was to find the middle point, and then measure 2" up till I reached both corners. Hopefully that makes sense. The width of the stripe should be 2" from any place that you measure, except for the points, which will measure 3" (this is all shown on the graph above). Writing this makes me realize how hard it is to write these tutorials... I feel like I'm not making any sense. I think once you get going you'll understand what I mean. This is going to take a while, and you want it to be even, so don't rush it.

-After all of my board was a big grid with gently marked pencil lined chevron, I taped over the stripes that I wanted to be the base color. You will need to be accurate, and you'll also need a sharp box cutter or straight edge that you can use to cut away any tape pieces if they are laying over (like if your tape overlaps at the tip of the point and you need to cut away the tape to make a perfect point).


IMAG0153

All taped up and ready for the second color!

One thing to note: on the outside edges of the MDF, even after sanding it was still pretty rough, which meant that my tape didn't hold onto the edges that well. At this point I was just ready to be done with my frame, so I didn't really care if it bled on the edges. If you care, then you may want to figure out a way to make the tape stay better than I was able to do.

-Once it's taped, make sure you rub the edges of the tape hard so that they are adhered as tightly as possible to the wood. Spray your top coat until it is even. I tried to not get too diagonal when I was spraying near the edges of the tape-- I figured it wouldn't hurt trying to help not getting it underneath it. For the most part, the tape held up well and I had only 2-3 spots where it lightly seeped under. Barely noticeably really.


IMAG0158
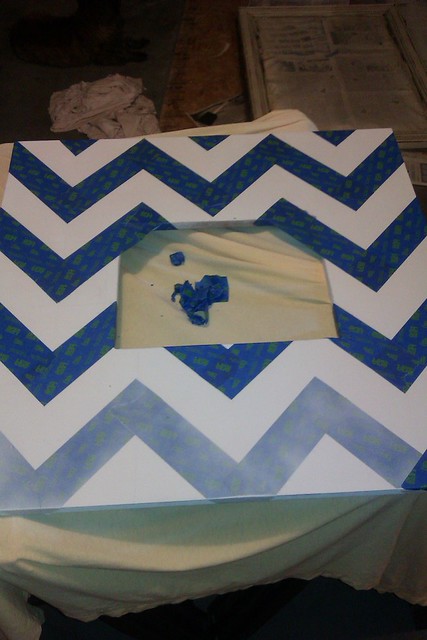
before I took the tape off
IMAG0159
Can you see where it seeped just a little? This is easily removed when you distress your frame later
IMAG0160
IMAG0161
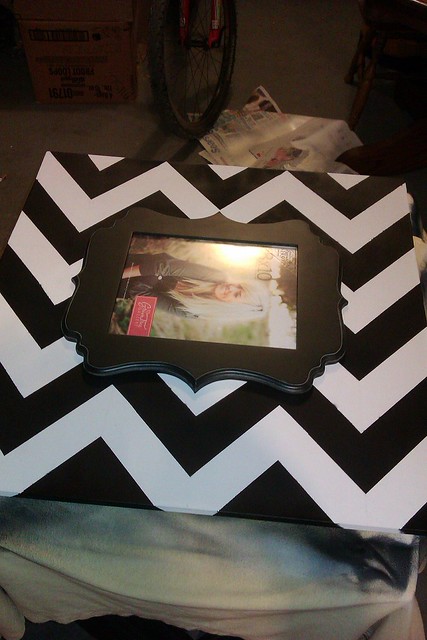
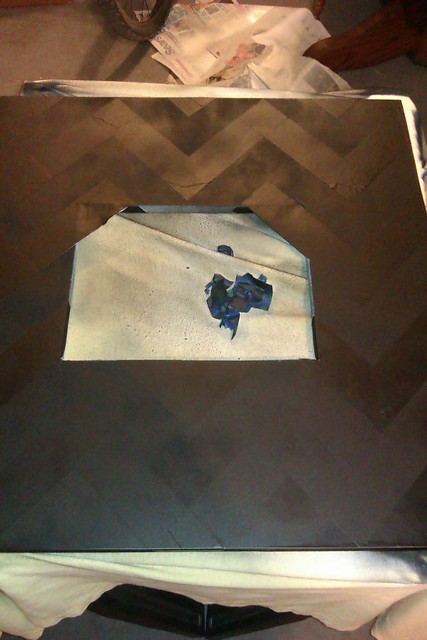
before distressing. It made me nervous with how bold it was... definitely glad to distress it a bit!


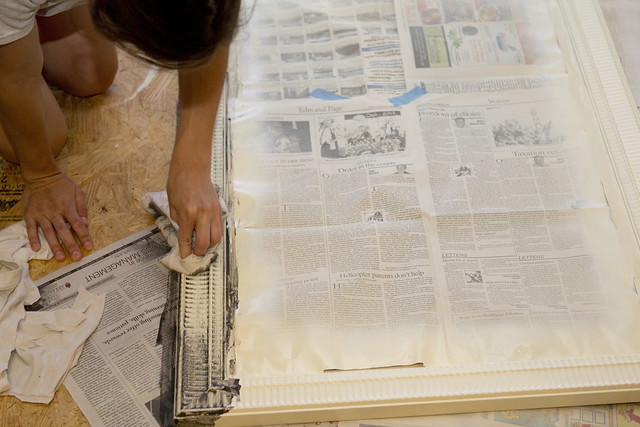
-You'll want your paint to cure (dry) for at least 24 hours before distressing. I waited 48. Just to be sure. I didn't want all that hard work to smear or get ruined after getting impatient. When I googled "distressing with sandpaper" I got several websites. None of which were too incredibly helpful. This left me a bit nervous about the last part of the process. I used 220 grit at first, as that seemed to be the universal grit used for distressing things. And I marched myself out to the garage to have a go at it. I took the paper to the edges, and then lightly rubbed over the entire thing, focusing on a few areas to make sure the top of it had a worn look too. I felt like it was still needing more distressing after I went over the whole thing with 220 grit, so I took out the 320 grit. At first, I freaked. It looked kind of scratchy. But after you keep going, it really wears down well, and you're left with some bare spots. I like bare spots. Know that the whole sanding process is a matter of preference. You can distress as little or as much as you want. That's the beauty of doing things yourself.

Once I was sure it was distressed like I wanted, I wiped the frame down really well with a damp cloth. I let the frame dry (it wasn't really wet, but it wasn't completely dry either. Be sure not to use too much water in your cloth, as MDF doesn't do well with getting wet). I then sprayed the whole frame down with Krylon clear acrylic spray paint. It's a non-yellowing finish. It was the satin sheen, which I felt like really gave the frame a nice finish. It didn't make it too glossy at all.


IMAG0182

All sanded, sealed and ready for the stacked frame.

-Once your frame is sanded and finished with your clear coat, you'll want to measure your center stacked frame for the middle, so that it's perfectly centered. Once it's centered you'll want to mark the edges, and then carefully use gorilla glue to attach the frame permanently to the baseboard. Drew did this step for me. You want to make sure you don't use so much glue that it seeps out of the sides, as gorilla glue does not dry on clear. While the glue is drying make sure you stack something heavy on top of the frame and baseboard so that it attaches securely.

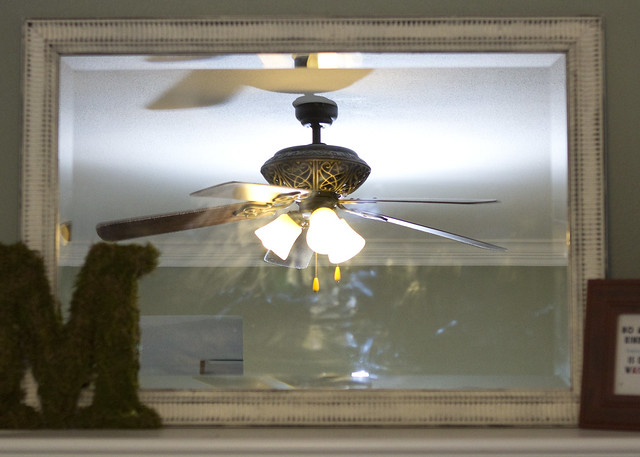
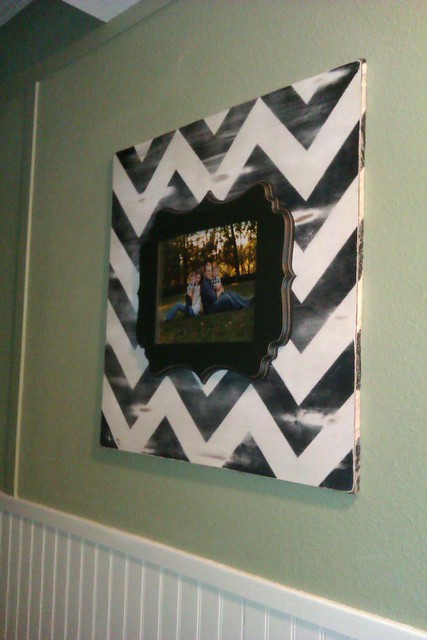
-And this is the finished product. I apologize for all of these pictures being phone pictures. After getting so frustrated at the beginning of the project, the last thing I wanted to do was whip out my nice camera and have to edit pictures too. ha! Drew used a screw and put it in a stud. He then hung the inside lip on the screw, making sure there was a little carving in the lip for the head of the screw. Hopefully that makes sense... I didn't take any pictures of it.... sorry about that.


IMAG0187
Ahhh. All for a frame. This project definitely stretched me. I'm still not sure I want to make more, even though I have enough MDF board to have a frame factory now :) Here's a breakdown of the costs so you can kind of know what you're in for money-wise if you do this project:


- MDF: $30
- Spray paint/Primer: ~$30
- sand block: $4
- clear coat: $4
TOTAL: $68

You save up to half of what it costs online. But you probably save a lot of sanity by just purchasing it outright from an etsy seller. I don't know, it's a tough call. Considering I have two young kids at home and I like getting along with my husband, I'm thinking etsy wins out next time. Not to discourage any of you from embracing your inner Martha Stuart and creating your very own frame masterpiece ;)

This post is linked up with the following link-ups:
Not Just a Housewife
Milk and Cuddles

Sunday, June 17, 2012

Father's Day Weekend in Review.

A shout out to all the baby daddies out there... this one's for you! ;)

Saturday morning we woke up bright and early (not that that's really a change to our schedule... our children wake up before the roosters) and headed down to Fayetteville to meet up with our good friends, the Allens. Katie and I left for a mountain biking excursion while the daddies stayed home with all of the children... 5 children to be exact, all ranging from 4 to 10 months. The boys did awesome and the girls had a great time (and I didn't fall off my bike this time, which is a major improvement from last weekend). After the bike ride we headed to the pool for some family fun. I didn't bring my camera, or my cell phone, so no pics of the fun outings :(

Saturday afternoon I got a pedicure in while the boys were sleeping. When they woke up we headed over to our neighbors house for a swimming party. We've been blessed to have great neighbors at our new house. They have a pool, and have been gracious to invite us over a few times for a swim. Their grandson was turning 4, and since he and Brayden get along so well, they invited us over for the party. We had loads of fun and left the party full and exhausted. Again, no pictures. Clearly I failed in the photography department this weekend.

Sunday was Father's Day. We gave Drew the gift of sleeping in. Honestly, I'm surprised he was able to sleep in as late as he did (8:30), as our house becomes like the Northwest Arkansas circus once the boys are up. The boys were running laps in the hallway, counting down and then racing each other, and then periodically checking in on dad by yelling at the door "Daddddddyyyyyyyyy!" Somehow Drew managed to still sleep, and we prepared a nice breakfast for the king when he awoke from his slumber. Brayden was SO excited this year to give him his father's day gift that he picked out (a Razorback polo shirt), and his card. B had almost slipped several times this week about the surprise, and whenever I would remind him that the present was a secret between only he and I, he would giggle and say 'Otay" and walk away :) Love that kid. After church Drew went mountain biking with a friend, and we met up at the local splash park when he was done. The boys had a blast sipping on sonic drinks and enjoying the water. And they got a real trip when the ice cream truck came by and we let them get popsicles. Double bonus for the littles.


IMAG0189
Waiting on Connor to wake up from his nap so we could leave for the splash park. He drives me nuts sometimes, but I love him so much!
IMAG0195
sippin' on Sonic at the Splash pad. Doesn't get much better!
IMAG0196
Can't believe my baby is almost 19 months old!
IMAG0198
hooray for the ice cream truck!
IMAG0203
what a mess.
Drew told me that he loved his Fathers Day today. I'm so glad. I honestly can't think of anyone better to model what it is to be a man than my husband. Watching him be a daddy to my babies has been one of the greatest joys of my life. I love you Drew and am so thankful that you are my man!


fathersday2012_9
dang you camera. I have no idea why it chose to focus on the bricks. My boys love their daddy so much
fathersday2012_5
no one can make Brayden laugh more than Drew
fathersday2012_4
gotta love the awesome 3 year old awkward faces
fathersday2012_2
So blessed to call all 3 of them mine. How did I get so lucky?!

We have a fun week in store, especially for momma, who leaves for a girls trip on Thursday for a bit of alone time with my besties. Yall can pray for Drew who will have the boys for 3 straight days ;)
 

A Dollop of My Life Copyright © 2007 -- Template created by O Pregador -- Powered by Blogger