

Gorgeous, right? It has the perfect feel of outdoorsiness (and yes, I realize I just made up a word), but also a hint of shabby chic. Not that I know ANYTHING about shabby chic. Pottery Barn actually sells something very similar. The problem is that they sell it for a pretty penny (or two). And considering I'm a cheap scape and don't want to dish out tons of money for something that I can make myself, I set out on a mission.
So.... I looked on pinterest and google for moss letter tutorials. The problem I ran into was that most of the tutorials called for a sheet of moss (sort of like a table cloth/table runner), and I wanted to use loose moss. Moss that looked like sheet moss but moss that I was able to pull apart at will. Also, I should clarify I didn't want spanish moss or reindeer moss either, both of which are sold loose. I also wanted a letter that had some dimension, and most of the tutorials I came across either used cardboard cutouts, or a dimensional paper mache letter from the Hob Lob. The problem with the mache letter was that it didn't have serifs. I realize this might not be a big deal to some people, but I'm a self-proclaimed font snob. And I wanted a serif letter on my mantle. I had the picture in my head of exactly what I wanted, and no one had a step-by-step guide. So I went in uncharted waters.... and did it on my own. I wasn't quite sure if the moss would adhere like I wanted it to since the letter was so (for lack of a better word) edgy, but it worked out well. Here's how I did it.

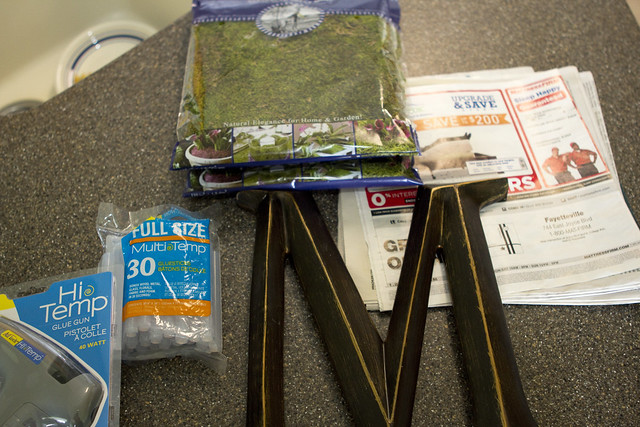
You'll need:
-letter (I purchased the letter at Hobby Lobby on sale for $5. It was on an end cap near the baskets, although I'm not sure that's where all Hobby Lobby's store these.)
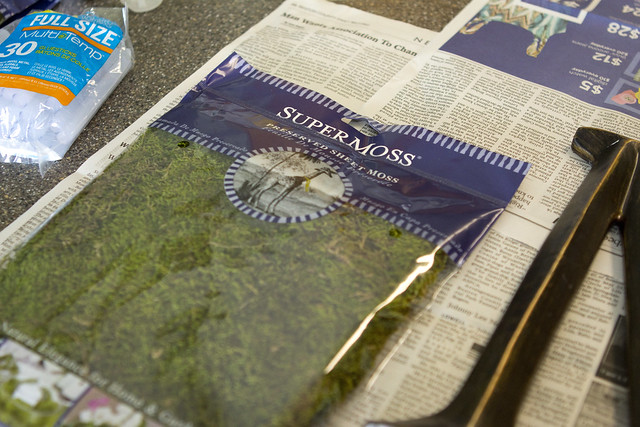
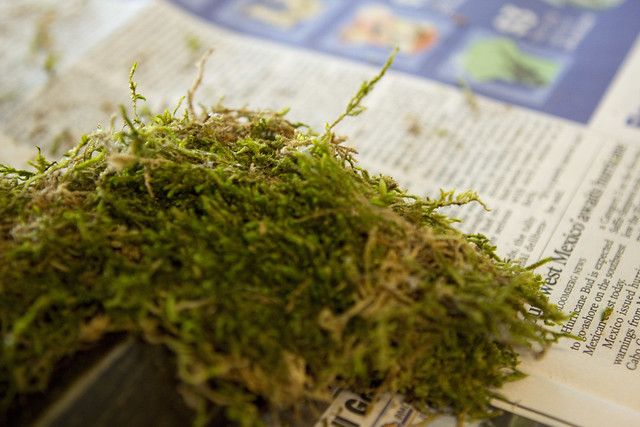
- 2 bags of loose sheet moss. The brand I used was called "Super Moss". I had a really hard time finding it, and should also note that Michael's was WAY more expensive than Hobby Lobby.
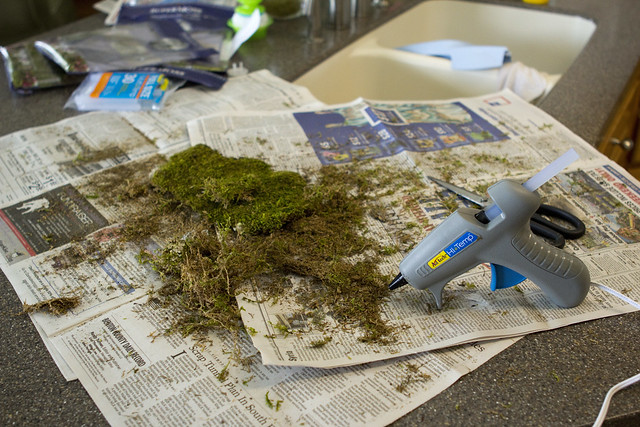
- hot glue sticks/glue gun. I didn't own either, so I had to go to Walmart to get these. I think they'll come in handy for the other items on my 'to-do' list.
- old newspaper. unfortunately this is a messy project. I layed newspaper down to combat the mess. It did a pretty good job keeping my counters dirt/dust free while I glued away.
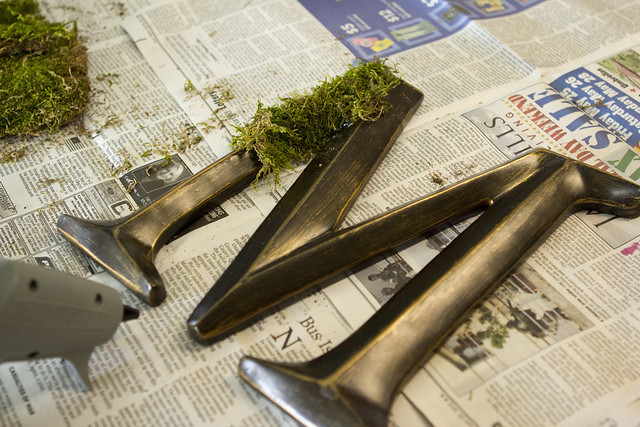
I pulled apart the moss into 1-2" chunks and glued as I went. I decided not to lay the moss across the middle ridge, and instead make both sides meet in the middle.

This is the letter half way done.
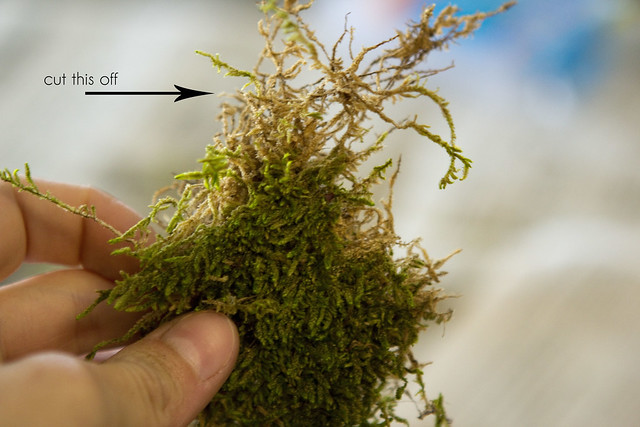
one thing to note is that the moss has a brown dirt/root backing. Sometimes the roots part would pull up when I was separating the pieces. I simply cut that brown part off so that my letter didn't have too much of this exposed
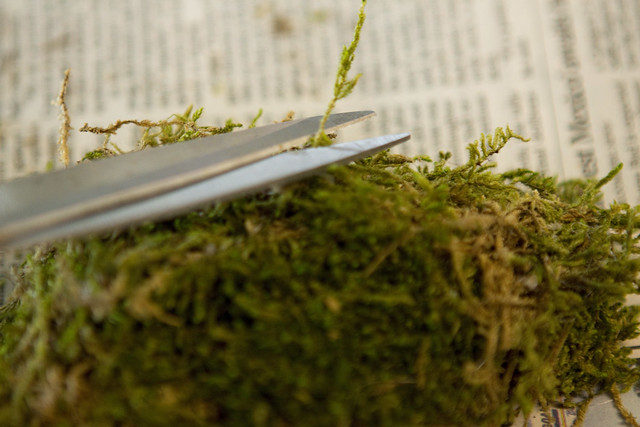
Also, some of the pieces had some "fly aways" that stuck out to far IMO. I simply used scissors to trim the excess moss so that it was relatively the same height all the way around the letter
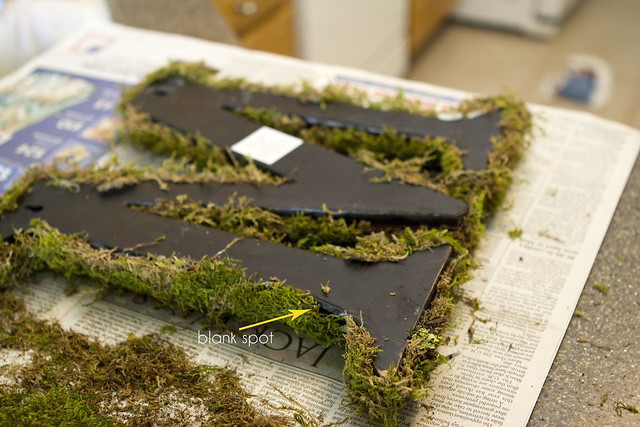
Once the letter is completely covered on the top part, I flipped it over. From the top it looked great, but when I flipped it over it had some blank spots. Example:
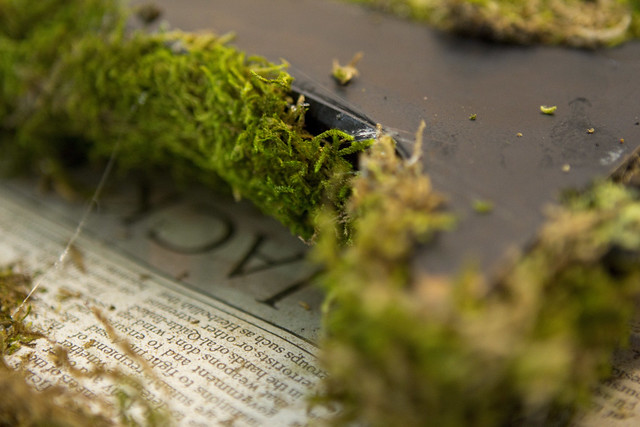
Here's a close up. I know it doesn't look that bad, but I'm a perfectionist and since I wanted it to look pretty, I wanted to be sure that all of the letter was covered. So carefully pull apart small pieces of moss to cover the pieces of letter that may not have been covered when you were working on the top. I was pretty generous with my moss usage and still only used a bag and a half of moss.
Here's my mess that was leftover after I was finished. Thankfully the newspaper caught most of the mess, and a simple wipe down of the counter did the rest of the cleaning
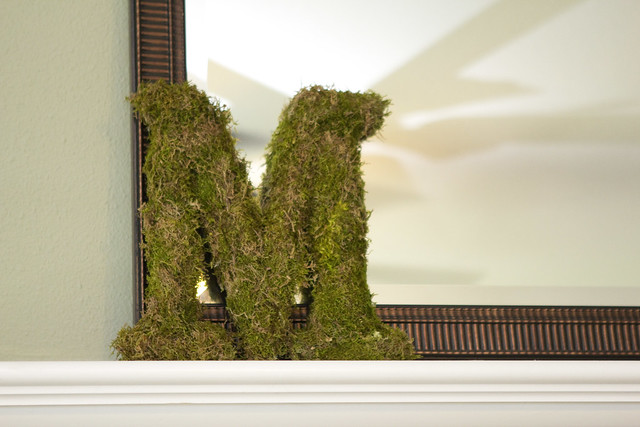
Here's the finished product. I love how chunky it looks, and the serifs add just the right touch. For some reason it looks less green in the picture than in real life.


